|
Once you get more than a few hundred digital photos, you will
need to think about how best to organize and file them.
Here's what works for me; the whole process right from the
time I take the photo. Taking the pictures
When I'm out and about taking pictures, I run the risk of
forgetting the details of each particular photo - what it's
a picture of, where it is, and so on. This is especially
relevant for me, as I take a lot of photos of wildflowers
and plants. I may not remember what a particular plant is by
the time I get home. I take care of this in one of two ways.
(1) My current digital camera (Canon Powershot Pro1) allows
me to make audio annotations for any photo. So, sometimes I
may be seen talking to my camera! (2) I make notes in a
notebook I always carry with me when I'm out. I record the
photo number (obtainable by checking the photo in "play"
mode).
Downloading the photos to my computer
Canon digital cameras are accompanied with "Zoombrowser"
software. Depending on your model of camera, this software
may allow you to connect the camera directly to your
computer (via USB) and download the photos that way.
However, I bypass this, and plug my Compact Flash cards
directly into a Compact Flash card reader, connected to my
computer via USB. I prefer this because I find the interface
of Zoombrowser to be overly simple, and a bit clunky. Well,
that's just my opinion! Perhaps you love it. :) So, I copy
the files usign WIndows Explorer from the Compact Flash card
to a folder on my computer.
Filing system on my computer
I have two hard drives in my computer. One is a 240GB and
the other is a 120GB. I keep a copy of all my digital photos
on both drives. Hard drives are the most likely part of your
computer to fail. And when they do, oftentimes nothing is
recoverable from them. Because of this, it is important to
have another backup of your photos as well. More about this
later.
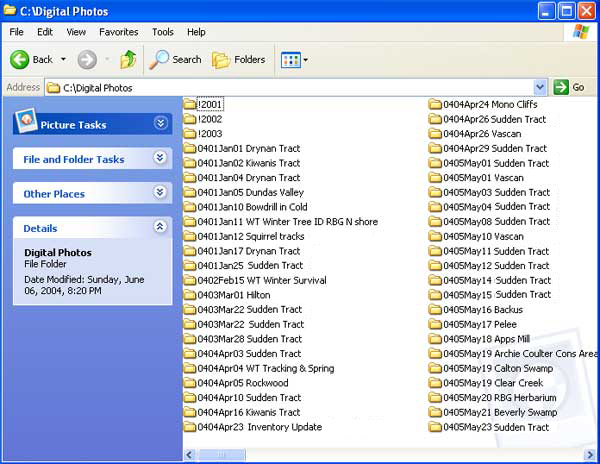
I create a folder on my computer for each day that I take
pictures. I keep prior year's photos/folders in their own
folder, by year. I preface the prior year's folder names
with a "!" to make them appear first on the list. Each
folder for the current year starts with the 2-digit year
followed by the two-digit month number. This ensures they
sort properly, in chronological order. I put the month name
spelled out next, so I don't have to think what month is
number 6 or whatever. Then the date, followed by a brief
description of where the photos were taken.
Processing photos after they have been downloaded
Photo numbering system
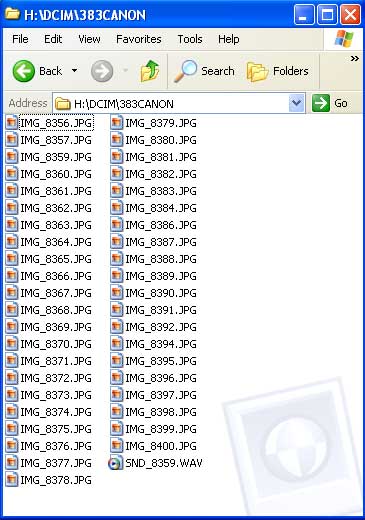
When the images come off the Compact Flash card, they
have next-to-meaningless filenames, as illustrated below.
But before I do anything else with the photos, I run them
through ZoomBrowser. "Why? I thought you didn't like that
program?", I can hear you ask. Well, it does have one very
useful feature, and that is to automatically rotate vertical
photos. However, to do this properly, you must operate
ZoomBrowser in "Zoom mode". Simply click on the folder where
your new photos are, and ZoomBrowser will do the rest. The
vertical photos will be displayed with the correct
orientation. Once it has displayed all the photos in the
folder, exit the program.
Original files from camera
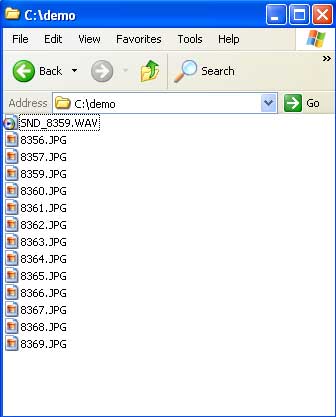
The next step is to get rid of the "IMG_" parts of the
filenames. For this and other file renaming tasks I use a
very handy and powerful shareware utility called "CKRename"
(available here).
Each photograph has a number automatically assigned to it
by the camera when it is taken. I like to preserve this
number, to be able to cross-reference to any
notes I made when I took the photo. In the example below,
this would be the 8356, 8357, etc.
"IMG_" removed from filenames
Just recently (Feb/05) I decided to number
each photo with a unique number, so that I could build up a
database of photos. This would be hard to do if the photos
were identified with a number that could repeat (the camera
only numbers photos up to 9999, then it starts over).
Additionally, sometimes I initially misidentify the subject
of a photos, change it later. Thus "Black Ash 8165" might
possibly become "Red Ash 8165." A unique identifier for each
photo bypasses these problems. For this I use, again,
CKRename. It can assign a sequential number to each
filename. The format I chose to use is a 2-digit year number
followed by a 6-digit sequential number. This allows me to
take up to 1 million photos per year. I don't think I'll
ever get to that kind of volume!
I need to do this sequential numbering step
here, so the order I took the photos in is preserved. Once I
add the description to each filename (next), the order will
be changed. I put the description at the front of the
filename so I end up grouping similar photos together in the
file list.
Unique sequential identifier added
to the end of each filename
My next step is to add a description of each
photo to the filename. This is shown in the sample below.
Note that I preserve the photo number assigned by the
camera. If the photo is simply a scenery shot, I often don't
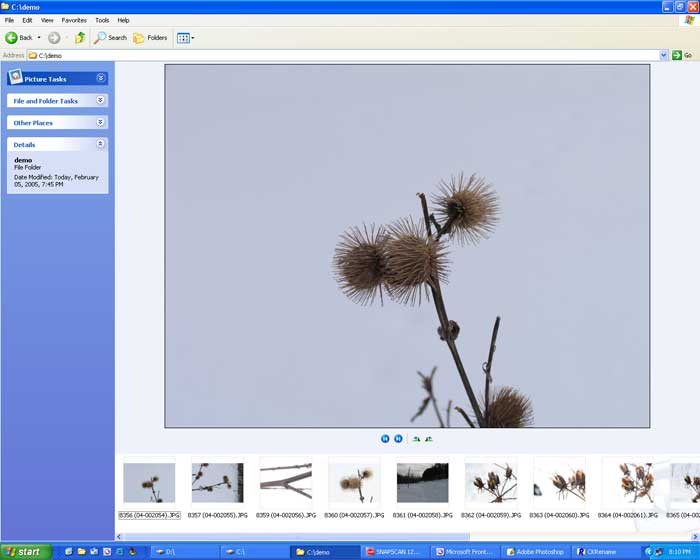
add any description to the filename. For this task I use
Windows XP "Filmstrip" view of the folder. This gives a nice
preview of each photo, while still giving me access to the
filename for renaming purposes.
Windows XP "Filmstrip" view
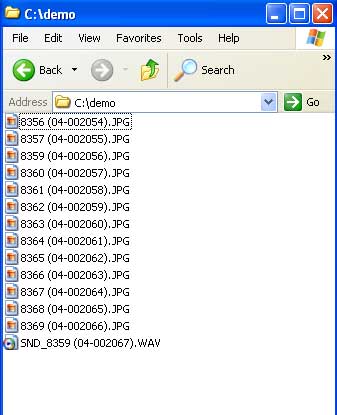
The results of adding the descriptions is
shown below.
Final filenames
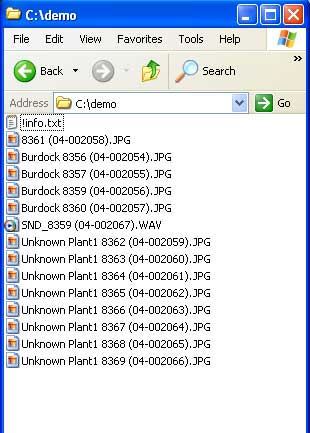
Note that the "SND_8359" file is still
present. This is a voice annotation file. Sometimes I keep
them, but usually I delete them. Although it has been
assigned a sequential unique identifier number, I don't
sweat it if I delete the file and there's a "hole" in the
series. Who cares.
I often add a text file to the folder for
notes. This is the "!info.txt" file at the top of the list.
I put a "!" at the beginning of the filename to make it stay
at the top of the list, so I can find it easily. This text
file contains comments about where I was, notes about plant
identification, and so on.
There's a couple of finishing-up steps left
to do. One is to make all the files "Read-Only." And the
next is to copy them to the second hard drive in my
computer.
Backup
If you're into digital photography, a CD or DVD burner is
a MUST. You may not have enough hard drive space to store
all your photos. As well, this is an excellent and low cost
method to backup your photos. I make two copies, and keep
one offsite. Let's face it, you probably put a lot of time
and effort into taking all your photos. If your computer
gets stolen, or both hard drives crash, or a virus deletes
all your files, or you delete your photos by accident, or
your kid gets onto your computer and deletes your photos, or
your house burns down, or whatever else that may happen, you
need a backup independent of your computer, and independent
of your house. BACK THEM UP. Summary
Now that you've seen my entire system, here
are the advantages of it, as I see them:
-
All photos are sorted by date and place,
by virtue of the folder in which they are stored.
-
Photos are identified as to what they
are (description added to filename)
-
All photos contain the original number
assigned to them by the camera when it was taken, to be
able to cross-reference to notes
-
Every photo has a unique identifier that
doesn't change (the unique sequential number)
-
It's harder to delete the photos as they
are all flagged "Read only"
-
There are several copies in case of
deletion, hardware failure, or theft
|

